這篇教學將帶你一步步在 Hugo Blowfish 主題中新增圖片比較滑桿功能。這個功能可以讓讀者透過拖拽滑桿來比較兩張圖片,非常適合展示前後對比、設計變化等內容。
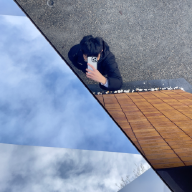
最終效果預覽#
完成後,你可以在文章中展示這樣的圖片比較功能:
讀者可以:
- 拖拽滑桿:用滑鼠點擊並拖拽中間的圓形滑桿
- 鍵盤控制:使用左右方向鍵精確控制
- 手機觸控:在行動裝置上用手指滑動
步驟一:建立 Shortcode 檔案#
首先,我們需要在正確的位置建立一個檔案。
1.1 找到正確的資料夾#
在你的 Hugo 網站根目錄中,找到這個路徑:
你的網站根目錄/
├── content/
├── config/
└── layouts/          ← 找到這個資料夾
    └── _shortcodes/   ← 如果沒有這個資料夾,請建立它
重要提醒: 資料夾名稱是
_shortcodes(有底線),不是 shortcodes!1.2 建立 img-comparison.html 檔案#
在 layouts/_shortcodes/ 資料夾中建立一個新檔案,檔名為 img-comparison.html
1.3 複製程式碼#
將以下程式碼完整複製到 img-comparison.html 檔案中:
{{< - $image1 := .Get "image1" - */}}
{{</* - $image2 := .Get "image2" - */}}
{{</* - $alt1 := .Get "alt1" | default "Before" - */}}
{{</* - $alt2 := .Get "alt2" | default "After" - */}}

{{</* - $resource1 := "" - */}}
{{</* - $resource2 := "" - */}}

{{</* - if findRE "^https?" $image1 - */}}
  {{</* - $resource1 = $image1 - */}}
{{</* - else - */}}
  {{</* - if $.Page.Resources.GetMatch $image1 - */}}
    {{</* - $resource1 = ($.Page.Resources.GetMatch $image1).RelPermalink - */}}
  {{</* - else if resources.GetMatch $image1 - */}}
    {{</* - $resource1 = (resources.Get $image1).RelPermalink - */}}
  {{</* - else - */}}
    {{</* - $resource1 = $image1 - */}}
  {{</* - end - */}}
{{</* - end - */}}

{{</* - if findRE "^https?" $image2 - */}}
  {{</* - $resource2 = $image2 - */}}
{{</* - else - */}}
  {{</* - if $.Page.Resources.GetMatch $image2 - */}}
    {{</* - $resource2 = ($.Page.Resources.GetMatch $image2).RelPermalink - */}}
  {{</* - else if resources.GetMatch $image2 - */}}
    {{</* - $resource2 = (resources.Get $image2).RelPermalink - */}}
  {{</* - else - */}}
    {{</* - $resource2 = $image2 - */}}
  {{</* - end - */}}
{{</* - end - */}}

<img-comparison-slider>
  <img slot="first" src="{{</* $resource1 */}}" alt="{{</* $alt1 */}}" />
  <img slot="second" src="{{</* $resource2 */}}" alt="{{</* $alt2 */}}" />
</img-comparison-slider>

{{</* /* 只在頁面有此 shortcode 時載入 CSS 和 JS */ */}}
{{</* if not (.Page.Scratch.Get "img-comparison-loaded") */}}
  {{</* .Page.Scratch.Set "img-comparison-loaded" true */}}

  <link rel="stylesheet" href="https://unpkg.com/img-comparison-slider@8/dist/styles.css">
  <script
    type="module"
    src="https://unpkg.com/img-comparison-slider@8/dist/index.js">
  </script>
{{</* end */}}
步驟二:準備你的圖片#
2.1 圖片放置位置#
對於每篇文章,圖片應該放在文章的 images 資料夾中:
content/
└── your-article/
    ├── index.md          ← 你的文章檔案
    └── images/           ← 建立這個資料夾
        ├── before.jpg    ← 第一張圖片(之前)
        └── after.jpg     ← 第二張圖片(之後)
2.2 圖片建議規格#
- 檔案格式:JPG、PNG 都可以
- 尺寸建議:兩張圖片最好有相同的長寬比例
- 檔案大小:建議每張圖片不超過 2MB,以確保載入速度
步驟三:在文章中使用#
3.1 基本語法#
在你的 Markdown 文章中,使用以下語法:
{{</* img-comparison
  image1="images/before.jpg"
  image2="images/after.jpg"
  alt1="修改前的圖片"
  alt2="修改後的圖片" >}}
3.2 參數說明#
| 參數 | 必填 | 說明 | 範例 |
|---|---|---|---|
image1 | ✅ | 第一張圖片路徑 | "images/before.jpg" |
image2 | ✅ | 第二張圖片路徑 | "images/after.jpg" |
alt1 | ❌ | 第一張圖片的替代文字 | "修改前的設計" |
alt2 | ❌ | 第二張圖片的替代文字 | "修改後的設計" |
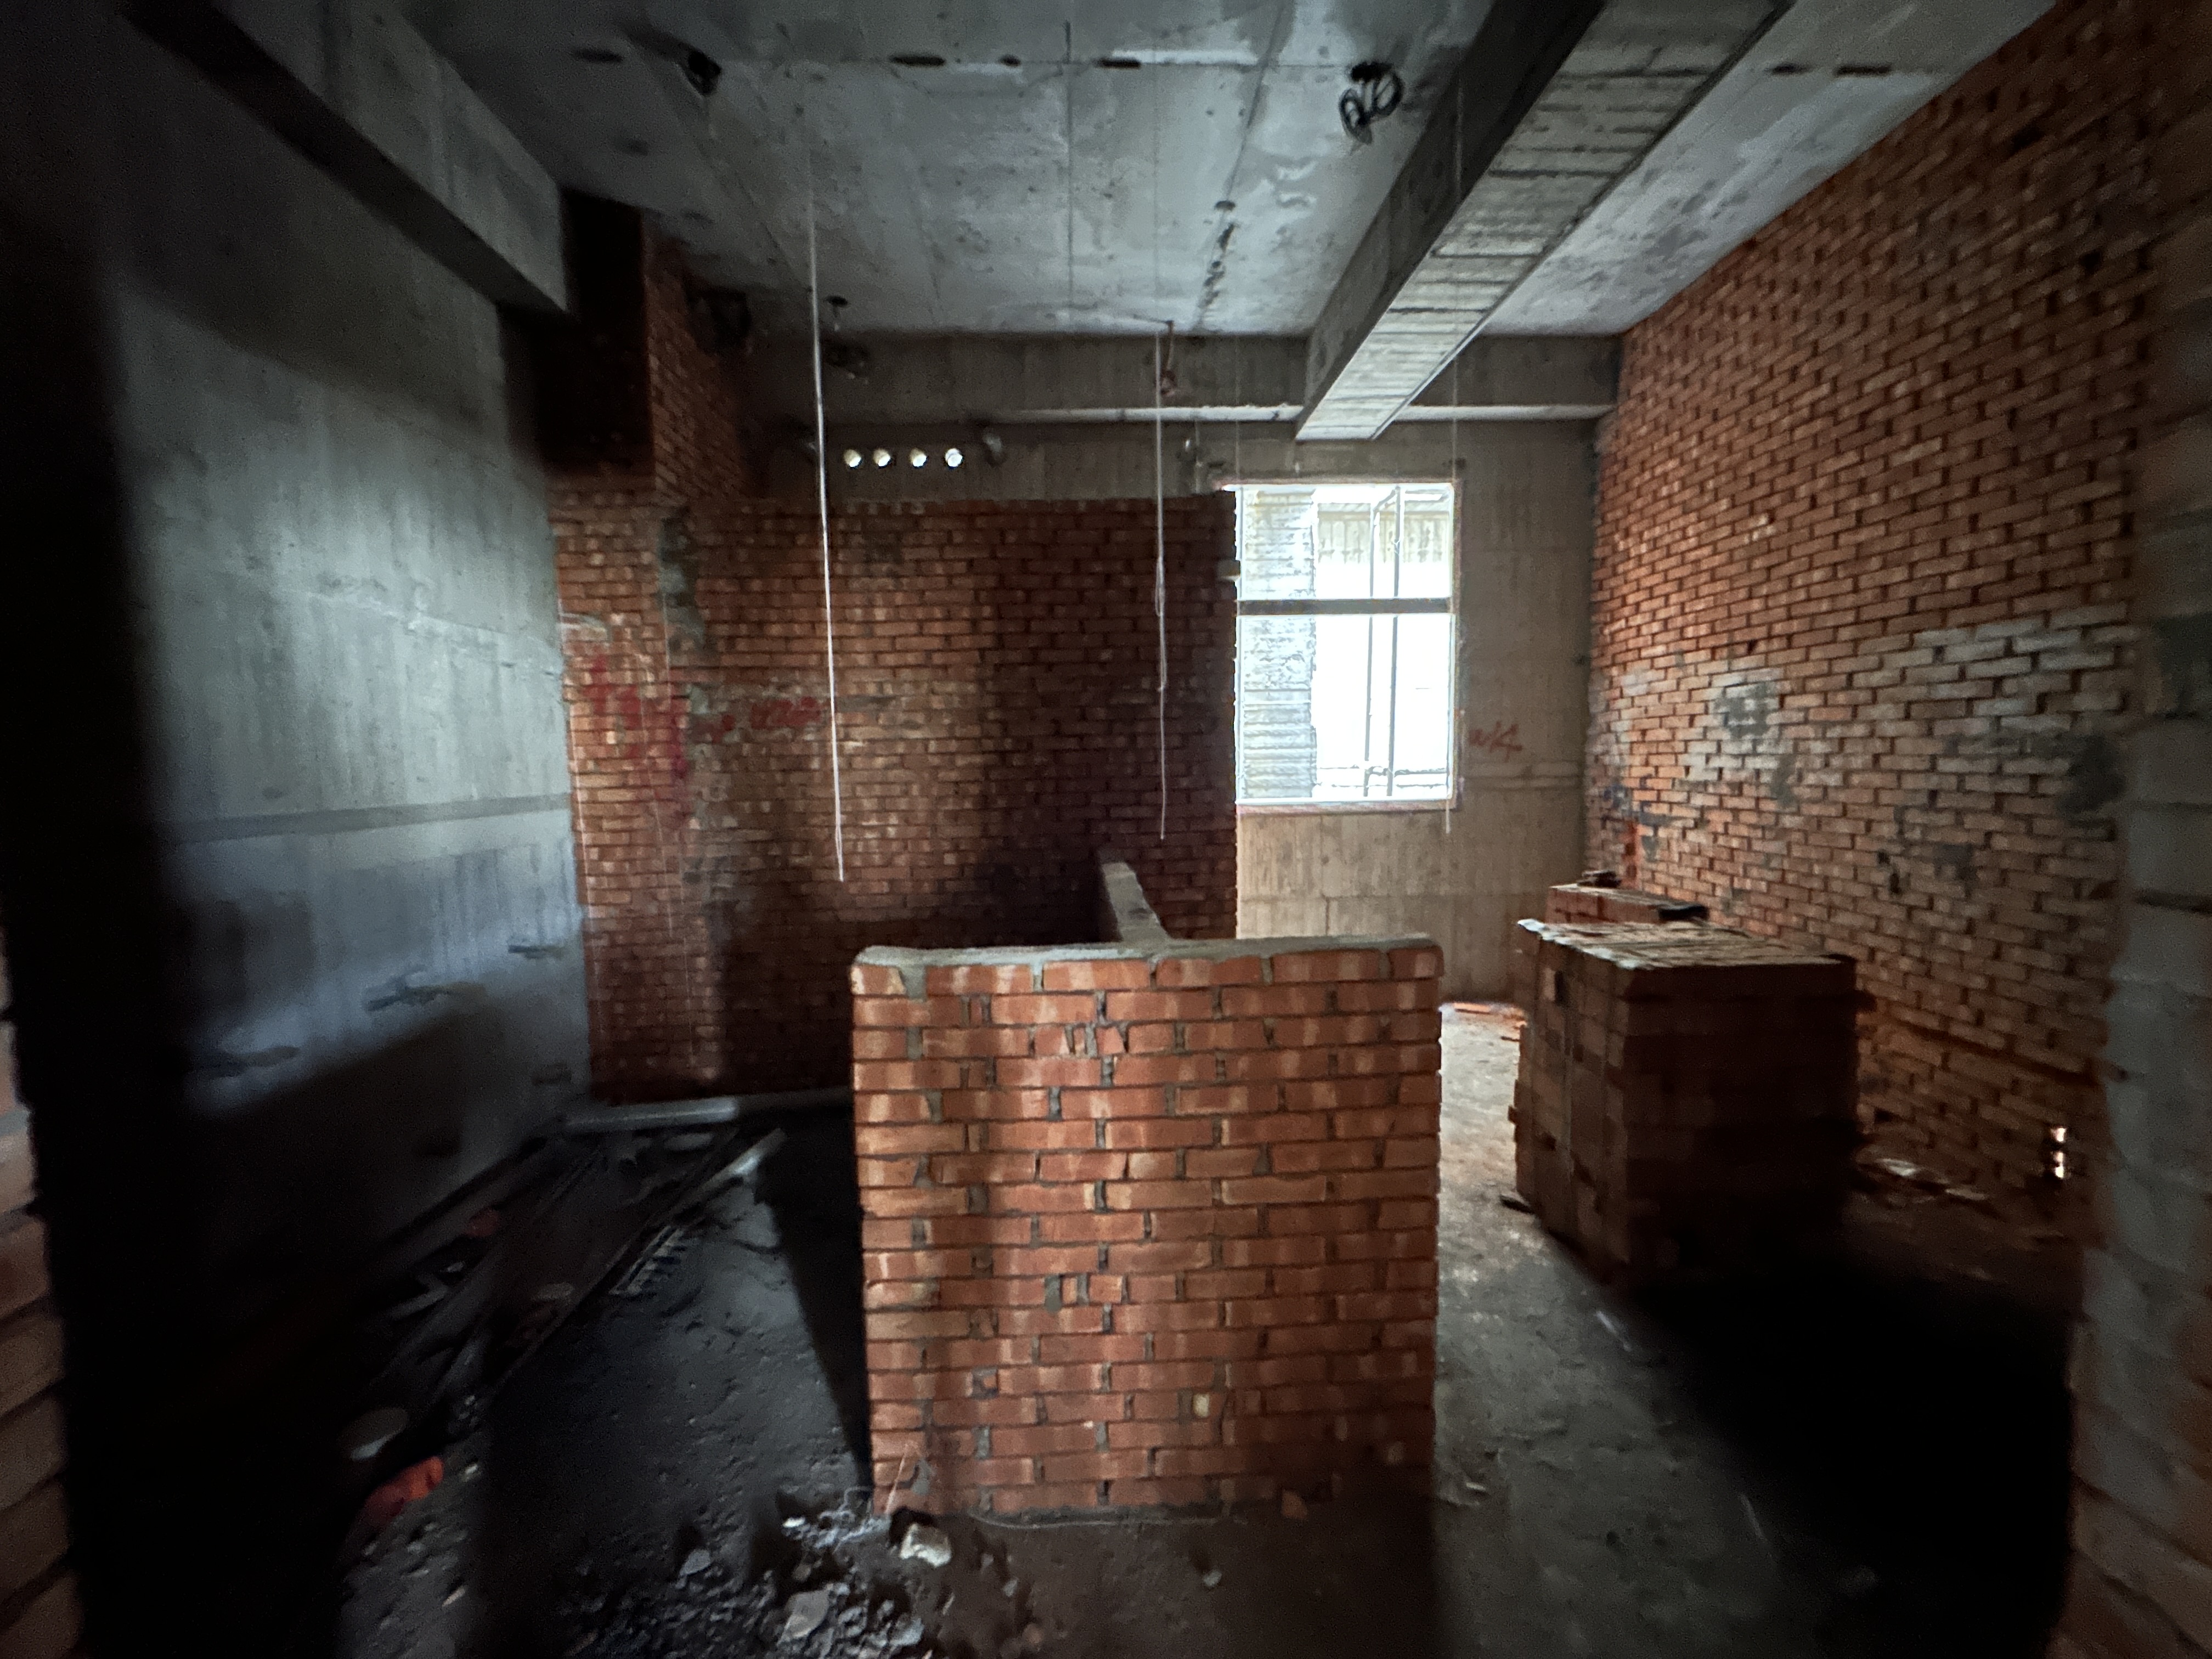
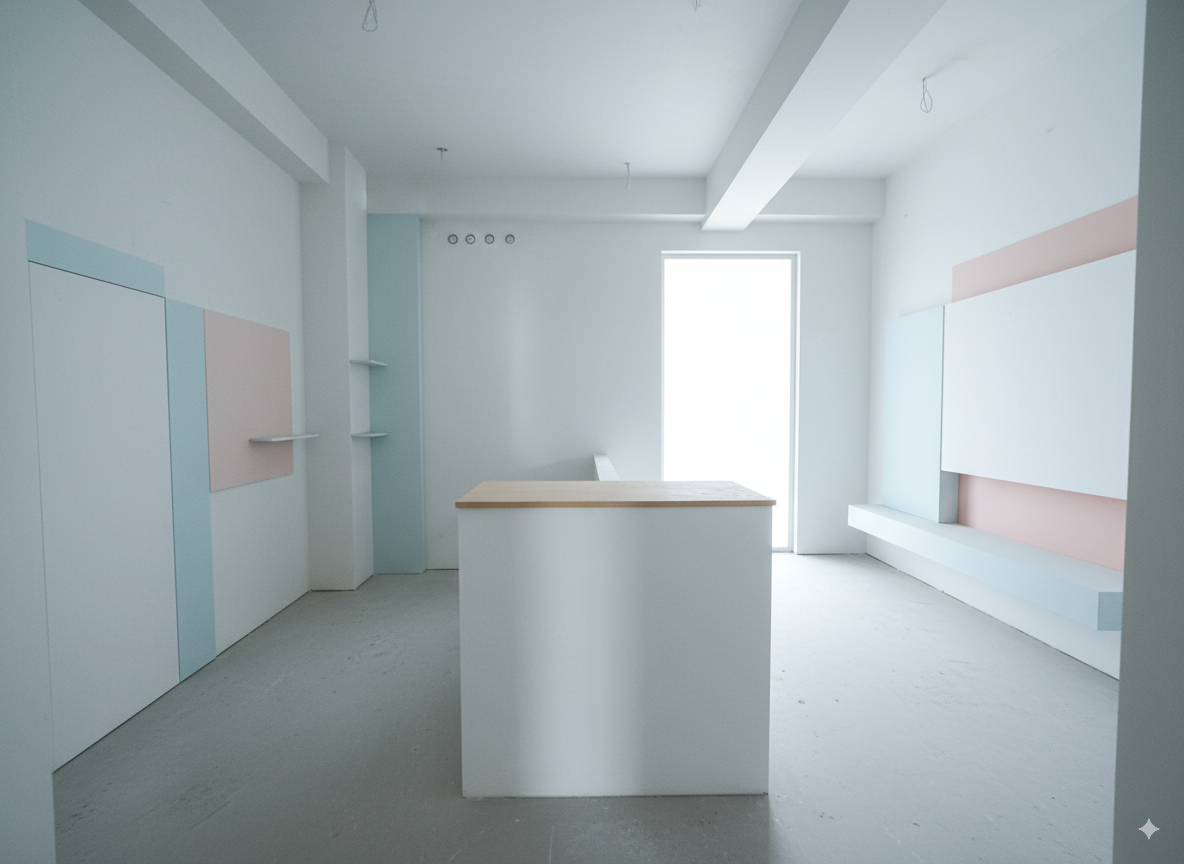
3.3 實際範例#
## 室內設計改造前後對比

{{< img-comparison
  image1="images/room-before.jpg"
  image2="images/room-after.jpg"
  alt1="改造前:雜亂的房間"
  alt2="改造後:整潔的現代風格" >}}

你可以拖拽中間的滑桿來比較改造前後的差異!
步驟四:重啟 Hugo 伺服器#
當你第一次新增這個功能時,需要重啟 Hugo 開發伺服器:
- 在終端機中按
Ctrl + C停止伺服器 - 重新執行
hugo server啟動伺服器 - 重新整理瀏覽器頁面
小提示: 之後使用時不需要重啟,只有第一次建立 shortcode 檔案時才需要。
進階自訂樣式#
如果你想自訂滑桿的外觀,可以在你的自訂 CSS 中加入以下樣式:
5.1 修改滑桿顏色#
/* 修改滑桿線條顏色 */
img-comparison-slider {
  --divider-color: #ff6b6b;
}

/* 修改滑桿圓鈕顏色 */
img-comparison-slider {
  --default-handle-color: #ff6b6b;
}
5.2 修改滑桿粗細#
/* 修改分隔線寬度 */
img-comparison-slider {
  --divider-width: 4px;
}

/* 修改圓鈕大小 */
img-comparison-slider {
  --default-handle-width: 50px;
}
常見問題解決#
Q1: 顯示「shortcode not found」錯誤#
解決方法:
- 確認檔案路徑是
layouts/_shortcodes/img-comparison.html(注意底線) - 重啟 Hugo 伺服器
- 檢查檔案名稱是否正確
Q2: 圖片無法顯示#
解決方法:
- 確認圖片路徑正確
- 檢查圖片檔案是否存在
- 確認圖片放在文章的
images資料夾中
Q3: 滑桿功能無法使用#
解決方法:
- 檢查網路連線(功能需要從 CDN 載入)
- 確認瀏覽器支援現代 JavaScript
- 檢查瀏覽器控制台是否有錯誤訊息
Q4: 教學文章中的範例程式碼意外執行#
問題描述: 在寫教學文章時,程式碼範例中的 shortcode 被 Hugo 意外執行了 解決方法:
- 使用 Hugo 轉義語法:將
{{< shortcode >}}改為{{</* shortcode */>}} - 這樣可以在文章中顯示 shortcode 語法而不會被執行
- 這是撰寫 Hugo 相關教學文檔時的常見注意事項
更多應用場景#
這個圖片比較功能適合用於:
- 設計作品集:展示設計前後的改變
- 產品比較:比較不同版本的產品
- 教學內容:展示操作前後的結果
- 攝影作品:展示修圖前後的效果
- 網站改版:展示改版前後的差異
完成!#
恭喜你!現在你已經成功在 Hugo Blowfish 主題中新增了圖片比較滑桿功能。這個功能不只實用,還能大大提升你網站內容的互動性和視覺效果。
記得多嘗試不同的圖片組合,找出最適合你內容的展示方式!